Installing your new sign is a simple, 4-step process. You will tape the included paper stencil to your wall, use a level to straighten it, and then place each self-adhesive sign piece into its matching cutout on the stencil. Finally, just peel the stencil away to reveal your perfectly placed sign.
Getting that flawless, professional look for your new business sign doesn't require a team of installers. At Skyline Laser Co., we designed our direct-to-wall signs to be a simple DIY project that you can complete in minutes.
This guide will walk you through the entire process, ensuring your sign is level, secure, and perfectly spaced.
Tools & Materials You'll Need
Before you start, gather these few items. Having everything ready makes the process seamless.
- Your Skyline Laser Co. sign pieces
- The included laser-cut paper mounting stencil
- A level (a 2-foot level is ideal, but a smaller one works)
- Masking tape or painter's tape
- (Optional) A pencil for making light guide marks
- (Optional) Construction adhesive (like Liquid Nails or Silicone) for highly textured surfaces
Step-by-Step Installation Guide
Follow these four simple steps to get your sign from the box to the wall.
Step 1: Position and Level Your Stencil
Find the perfect spot for your sign. Hold the paper stencil up to the wall and use your level to make sure it's perfectly horizontal.
Once level, secure the stencil to the wall using masking tape or painter's tape. Place tape on the corners and along the edges to ensure it doesn't move.
Step 2: Peel and Stick Your Sign Pieces
Your sign pieces come with a high-bond, double-sided transfer tape already applied. This tape is extremely strong and designed for a long-lasting hold.
One by one, peel the protective film off the back of a sign piece.
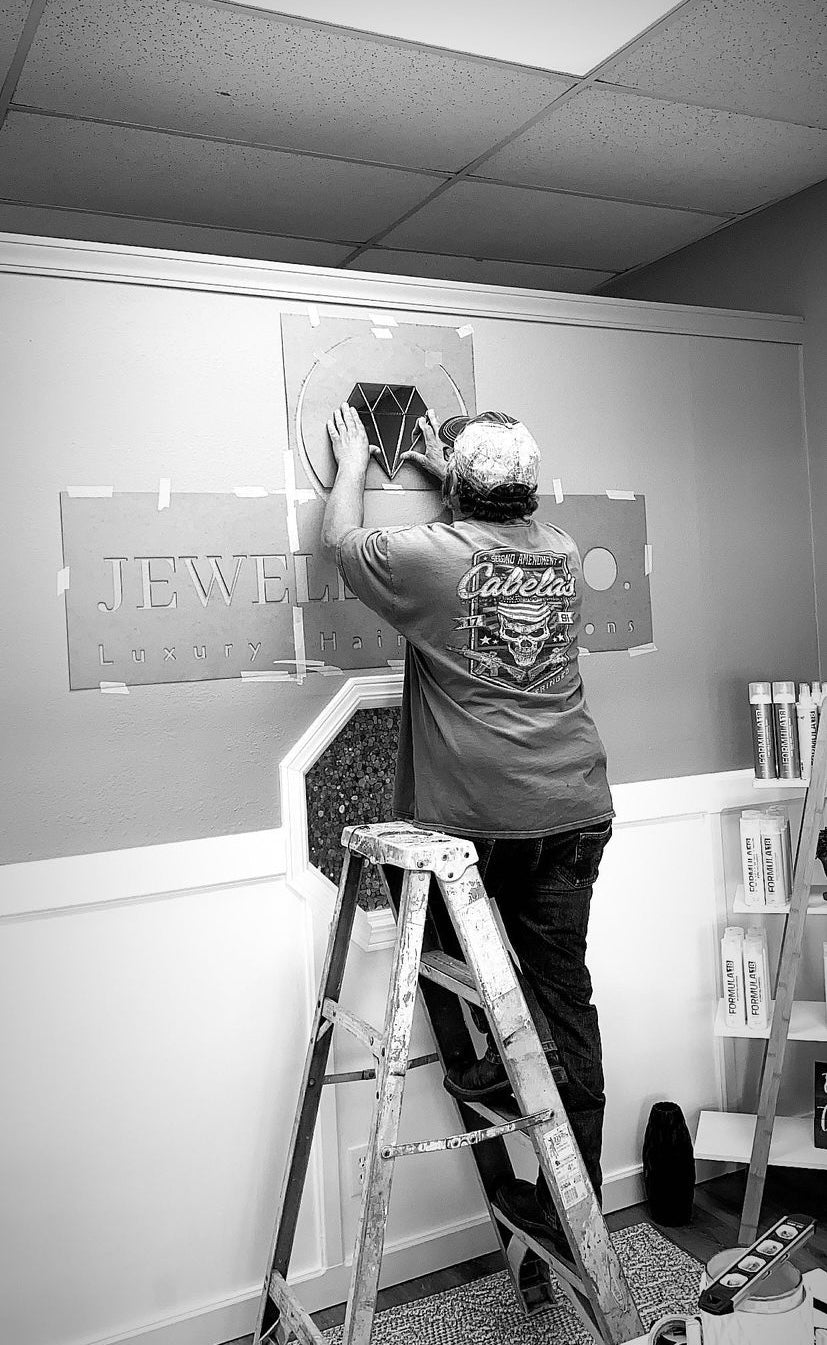
Step 3: Mount Each Piece
Carefully press the adhesive side of the sign piece into its corresponding cutout in the paper stencil. The stencil ensures your spacing and alignment are perfect.
Press firmly on the piece for 5-10 seconds to ensure the adhesive creates a strong bond with the wall. Repeat this "peel and stick" process for all the pieces of your sign.
Step 4: The Big Reveal
Once all pieces are firmly on the wall, it's time for the final step. Carefully and slowly peel the paper stencil away from the wall.
That's it! Step back and admire your perfectly installed, professional-grade sign.
A Pro-Tip for Textured Walls
The included double-sided tape is incredibly strong and works perfectly on most smooth and semi-smooth surfaces (like drywall, painted wood, and glass).
However, if your wall is highly textured (like stucco, brick, or rough concrete), the tape may not be able to make full contact. For these surfaces, we recommend reinforcing the hold by adding a few small dots of construction-grade glue (like Liquid Nails or clear silicone) to the back of each piece in addition to the tape.
Frequently Asked Questions (FAQ)
Q: How long will the double-sided tape last?
A: We use a premium, heavy-duty transfer tape. When applied to a clean, smooth indoor surface, the bond is considered permanent and will last for many years.
Q: Can I remove the sign later?
A: It is possible, but it requires care. You will likely need to use a heat gun or hairdryer to soften the adhesive and then slowly pry the pieces off. Depending on the wall surface, this may cause some paint damage that will need to be touched up.
Q: What's the best way to clean my wall before installation?
A: For best results, gently wipe the installation area with a clean, dry cloth to remove any dust. For surfaces in kitchens or high-traffic areas, you can use a cloth lightly dampened with isopropyl alcohol to remove any grease or oils, then let it dry completely.
Q: What if I mess up and place a letter crooked?
A: This is why the stencil is so important! The adhesive bonds very quickly, so it's difficult to reposition. Take your time aligning the piece within the stencil before you press it firmly to the wall.
Ready for Your Own Custom Sign?
A great sign makes all the difference. If you're ready to elevate your space, shop our full collection of custom business signs or contact our design team today to bring your vision to life!